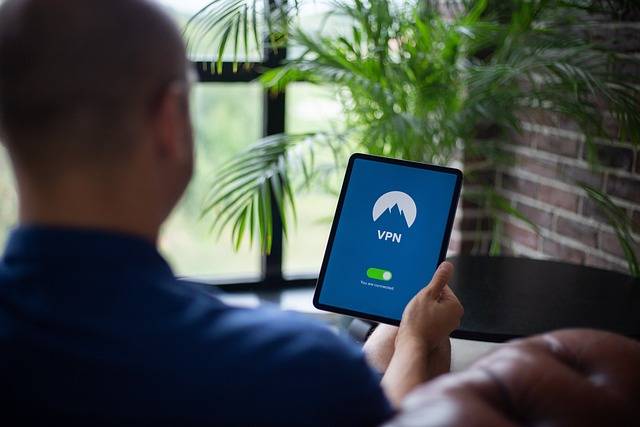

Are you looking for a secure and private way to browse the internet? A virtual private network (VPN) is one of the best solutions available. With a VPN, you can unlock the benefits of an encrypted connection, create your own secure network in minutes, and keep your data safe from prying eyes.
In this article, we’ll provide a step-by-step guide on how to build your own customized VPN so that you can get started now with peace of mind.
Table of contents: How to create your own vpn
- Unlock the Benefits of a Personal VPN
- Create Your Own Secure Network in Minutes
- Step-by-Step Guide to Setting Up Your Own VPN
- Keep Your Data Safe: DIY Virtual Private Networks
- Get Started Now: How to Build a Customized VPN
Creating your own virtual private network (VPN) is a great way to ensure the security of your data and protect yourself from cyber threats. A VPN allows you to access the internet securely, anonymously, and with greater privacy than ever before.
Setting up a VPN can be intimidating for those who are unfamiliar with networking technology, but it doesn’t have to be complicated or expensive. Here are some tips on how to create your own VPN:
1. Choose Your Protocol – The first step in creating a secure connection is choosing which protocol you want to use for your connection. Popular protocols include OpenVPN, PPTP/L2TP/IPSec, IKEv2/IPsec, and SSTP; each has its advantages and disadvantages, so make sure you do research on each one before making a decision about which one will work best for you.
2. Select Your Server – Once you have chosen the protocol that works best for your needs, it’s time to select the server that will host your new VPN service provider account information as well as any other data associated with it, such as user accounts or IP addresses assigned by the server itself.. You can either rent space from an existing hosting company or set up an independent server if needed; however,r this may require additional technical knowledge depending on what type of hardware is being used in the setup process.
3. Configure Security Settings – After selecting both the protocol and server type, the next step would be configuring security settings such as authentication methods, encryption algorithms, firewall rules, etc. These settings should be tailored according to specific requirements like the desired level of protection against malicious attacks etc. It’s important not only to configure them properly but also to keep track of changes made over time since they could affect performance negatively if left unchecked.
Unlock the Benefits of a Personal VPN
If you’re looking to unlock the benefits of a personal VPN, creating your own is an excellent way to do so. A virtual private network (VPN) provides users with secure access to their data and online activities from any location. Not only does it protect your privacy, but it also allows you to bypass geo-restrictions and unblock websites that may be blocked in certain countries or regions.
Creating your own VPN can seem daunting at first, but there are several options available for those who don’t have technical expertise or resources. Many companies offer pre-configured solutions that require minimal setup on the user’s part – all they need is an internet connection and a device capable of running the software. Alternatively, some providers allow users to create their own custom configurations using open-source software such as OpenVPN or SoftEther VPN Client Manager.
No matter which option you choose, setting up a personal VPN will provide numerous advantages over traditional methods of accessing the web: improved security against cyber threats; enhanced anonymity when browsing; unrestricted access regardless of geographic location; faster speeds due to reduced latency; and increased control over how data is shared across networks. With these benefits in mind, creating your own personal VPN could be one of the best decisions you make this year!
Create Your Own Secure Network in Minutes
Creating your own secure network in minutes is now easier than ever. With the right tools and knowledge, you can quickly set up a Virtual Private Network (VPN) that will keep your data safe from prying eyes.
A VPN allows you to create a private tunnel between two or more computers, allowing them to communicate securely over the internet without anyone else being able to intercept or view their traffic. This makes it an ideal solution for businesses that need secure communication between remote offices, as well as individuals who want added privacy when browsing online.
The first step in setting up your own VPN is choosing a reliable service provider with good customer support and features like unlimited bandwidth and server locations around the world so you can access content from any country without restrictions. Once you’ve chosen a provider, they will provide instructions on how to configure your connection settings on each device connected to the network – usually, this involves downloading software onto each device that handles all of the encryption automatically for maximum security.
Next comes configuring firewalls and other security measures, such as two-factor authentication if desired; these are important steps in ensuring no one, but authorized users have access to sensitive information stored within the network itself or transferred across it via email or file-sharing services like Dropbox. Finally, once everything has been configured correctly, then testing should be done by connecting devices both inside and outside of the network before going live with it officially – this ensures there are no weak points where hackers could potentially gain access to systems through unsecured ports or any other means.
Overall creating your own secure network doesn’t have to be complicated; following these simple steps should get most people up and running quickly with minimal effort required!
Step-by-Step Guide to Setting Up Your Own VPN
Are you looking for a secure and private way to access the internet? Setting up your own virtual private network (VPN) may be the perfect solution. With a VPN, you can protect yourself from hackers and cybercriminals while also bypassing geo-restrictions. In this step-by-step guide, we’ll show you how to set up your own VPN in no time.
First of all, it is important to understand what a VPN does: It creates an encrypted tunnel between your device and another computer on the internet. This means that any data sent through this tunnel is kept safe from prying eyes or malicious actors who might want to intercept it.
The next step is choosing which type of service provider will host your VPN connection – there are many different options available, ranging from free services such as ProtonVPN or Windscribe, paid services like NordVPN or ExpressVPN, and even open-source solutions like OpenVPN or SoftEther. Each has its own advantages and disadvantages, so make sure you research each one thoroughly before making a decision about which one best suits your needs.
Once you have chosen a service provider, follow their instructions carefully when setting up the connection on both ends – typically, this involves downloading software onto both computers involved in order for them to communicate with each other securely over an encrypted channel using either PPTP (Point-to-Point Tunneling Protocol) or L2TP/IPsec (Layer 2 Tunneling Protocol). Ensure that all passwords used are strong enough not to be easily guessed by anyone trying to gain unauthorized access!
After everything has been configured correctly at both ends of the connection, then it should be ready for use – simply connect via whichever protocol was chosen earlier and enjoy secure browsing! If desired, then additional security measures such as two-factor authentication can also be enabled in order further enhance protection against potential threats online – just remember, though, that these extra steps will add complexity, so only enable them if absolutely necessary!
Setting up your own virtual private network doesn’t have to be difficult; with some careful planning beforehand, plus following our simple step-by-step guide above then, anyone should find themselves connected securely within minutes – happy surfing!
Keep Your Data Safe: DIY Virtual Private Networks
As the world becomes increasingly digital, it is essential to ensure that your data remains safe and secure. One of the best ways to do this is by creating a virtual private network (VPN). A VPN allows you to create a secure connection between two or more devices over an unsecured public network, such as the internet. By using a VPN, you can protect your data from hackers and other malicious actors who may be trying to access it without authorization.
Creating your own DIY VPN can seem like an intimidating task, but with some basic knowledge and guidance, anyone can do it! The first step in setting up your own DIY VPN is selecting which protocol you want to use for encryption. There are several different protocols available, including OpenVPN, IPSec/L2TP/IPsec, IKEv2/IPSec, and WireGuard®️. Each protocol has its own advantage, so make sure that you select one that meets all of your security needs before moving forward with setup.
Once you have selected a protocol for encryption, then comes configuring the server side of things; this includes setting up port forwarding on routers if needed as well as establishing user authentication methods such as username & password combinations or certificates-based authentication depending on what type of device will be connecting through the tunneled connection created by the VPN service provider’s servers. Additionally, make sure any firewalls are properly configured so they don’t block incoming traffic from reaching their intended destination within local networks.
Finally, once everything has been set up correctly, users should test their new DIY Virtual Private Network (VPN) by accessing websites via IP address instead of the domain name – this will help them verify whether or not their newly established tunneling connection works correctly before relying on it completely for sensitive information transmission purposes. With these steps taken care of, users now have complete control over how they keep their data safe while browsing online!
Get Started Now: How to Build a Customized VPN
Are you looking to create a customized VPN? With the right tools and knowledge, it is possible to build your own virtual private network. This article will provide an overview of the steps needed to get started on building a customized VPN.
The first step in creating a custom VPN is setting up the server that will host your network. You can either rent or purchase dedicated servers from hosting companies or use cloud-based services such as Amazon Web Services (AWS) for this purpose. Once you have chosen and set up your server, you need to configure it with appropriate software for running a secure connection between two points on the internet – usually referred to as tunneling protocols like OpenVPN or IPSec/IKEv2.
Next, you must decide which type of encryption protocol best suits your needs – there are several options available, including SSL/TLS, SSH Tunneling Protocols, and PPTP, among others – each offering different levels of security based on their implementation details. Additionally, make sure that all devices connected through this network support these protocols before proceeding further with the configuration setup process; otherwise, they won’t be able to connect securely over this new system!
Once everything has been configured correctly at both ends (server & client side), users should be able to access their data securely via encrypted channels without any issues whatsoever! To ensure maximum safety while using these networks, however; one should always remember not to share sensitive information online unless absolutely necessary – since even though traffic may be encrypted end-to-end; malicious actors could still intercept them if given enough time & resources!
Finally, once everything has been set up properly and tested thoroughly by you or the IT personnel responsible for managing such systems; then only can one consider themselves ready to start using their newly created custom VPN safely without worrying about potential breaches in privacy due to external threats lurking around every corner of cyberspace today!